Mechanics
This part of the guide will tell you all that you should know as a beginner!
Contents of the page: ExpandCollapse
Gameplay[edit | edit source]
The game uses the touchscreen as the main form of interaction, allowing the player to input commands using their fingers. Combat against enemies is done using coins/medals, particularly "Striker" Medals, each of which represents one character and their ability set. Like some card battler games, players must take into account a medal's available health and special attacks as well as take advantage of combo systems that will chain stronger attacks together. A game will finish when all units of one team are defeated. If the player manages to kill all the enemies but it also loses his units, it will count as a loss.
A team is made up of at least one unit and up to 5, including a guest or friend. The first position belongs to the Leader and the fourth to the Standby. This last, only will appear on the stage only if another ally unit dies (can be swapped with other unit with certain abilities). The Leader will bring an extra Ability called Leader Skill.
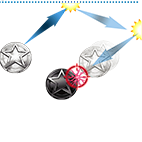
To move your units, just drag the character to the opposite desired direction and release it to start moving. While moving, tap once anywhere to stop moving and dealing a Smash attack. To check the stats and some abilities of any unit, including enemies, just tap once the coin. If instead of poping up the info window your coin just flips in the air that means that you are going to use his Command Skill.
Skill Gauge[edit | edit source]
Skill Gauge is a valuable resource. It can allow you to use it in various ways with the right units like reviving, gaining buffs, improving defense, but most importantly using your Command Skill like already said before. Skill Gauge can also be gained from various things like hitting enemies, Smashing near enemies and using Abilities that give Gauge in one way or another. If one of your units dies, you will gain one bar of Gauge.
Enemies can drain Gauge or reduce the amount gained. Another way of losing Gauge is through Abilities.
Action Count[edit | edit source]
Action Count is a counter that every enemy has. It tells you in how many of your moves will the enemy get their turn and move on their own.
This counter can be manipulated not just by you, but the enemies too. For example, setting Action Count to 0 on field appearance so they move as soon as they drop (unless you have some sort of delay to prevent that), decrease their action by more than 1 after each move, or prevent the counter going above a certain number entirely. What you can do with action counts though are usually adding to it in various ways, or lowering it as a downside to some sort of buff. The former of which is much more preferably in most situations of course.
Adding to Action Count (AKA delaying) is very important at all levels of play, as one enemy can just destroy your whole team in an unlucky situation. The best type of delay is "per turn" delay, which as the name implies, delays all enemies at the start of each turn for a number of turns and the one unit that has this type of delay that lasts for a lot of turns is SP Rohan (it's one of the main reasons as to why he's SS tier).
1more[edit | edit source]
This is a mechanic that lets you move for an additional time after defeating an enemy during a unit's action. Enemies can have 1mores too, but it isn't very common.
It can prove to be a very powerful tool, especially when built around with units like Joselisa that puts more colors into your positive attribute pool and makes you deal more damage to them. This combined with Watchtaro that allows you to chain 1mores and a Smash changer makes basically any red unit into a complete powerhouse.
Something that's good to remember is that despite the explanation above, 1mores don't actually count as separate moves. This can help you in a lot of ways like not lowering move counter in Limit Battle and preventing a buff from decaying that lasts for X amount of moves.
Smash[edit | edit source]
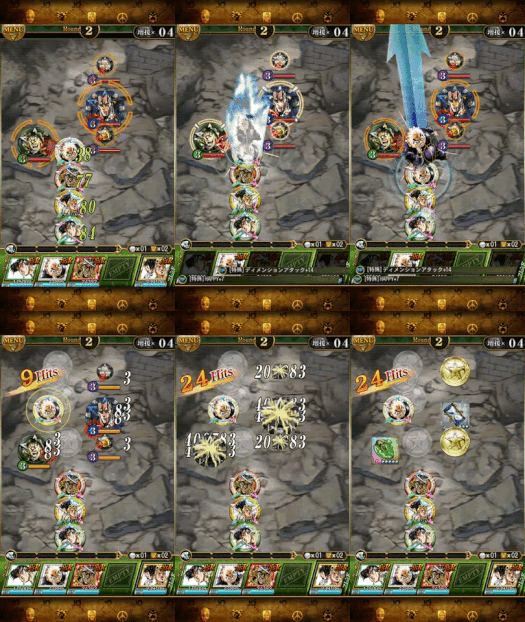
The Smash is a single attack you can perform by tapping during a unit's movement, and you will deal damage around said unit in a circle shape. This attack can be improved with Abilities, increasing the damage done, adding more Smashes, changing the size and/or shape... That also means that enemies can change it too, usually reducing the size or nullifying completely.
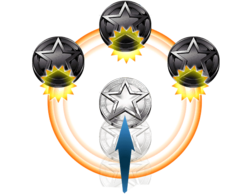
There are enemies with Smash counter. If you try to Smash near of one of these enemies, your movement will stop and you will receive damage.
This attack can't be done by enemies.
Smash modifiers[edit | edit source]
Smash modifiers, as the name suggests, change your Smash to something completely different, so Smash counters won't affect you, but Smash buffs won't either. Some modifiers have synergy between them while others will overwrite one another.
Here is a list of the current Smash modifiers units.
Weak Point[edit | edit source]
Weakpoints can be found on some enemies, though not every single one. These weakpoints will always face away from the nearest ally and hitting said weakpoint will add +1 to their Action Count and deal more damage to them.
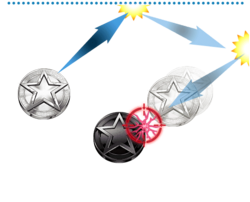
This can also be manipulated in some ways, like forcing a weakpoint onto every enemy on the field and even making them face towards the nearest ally or even create one when the enemy doesn't have a weakpoint.
It can also be built around like many other mechanics. For example, GQ with PMF can be very strong as GQ's Ability deals weakpoint damage to the nearest enemy when you don't Smash (this procs after using Command Skill), which activates PMF Ability that grants you a 1more with an ATK multiplier after hitting an enemy's weakpoint, letting you do a Command Skill once again.
Traps[edit | edit source]
See also: Pickups
Traps or Items can be spawned by you and enemies alike. Most of them can be interacted with by running an ally or enemy into it. There are even some Abilities that base their effect off of the items on the field, like Mikitaka or Mariah, and some that destroy items (See Recommended Units).
Area Skill[edit | edit source]
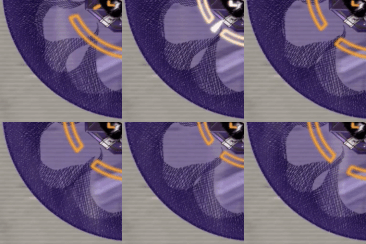
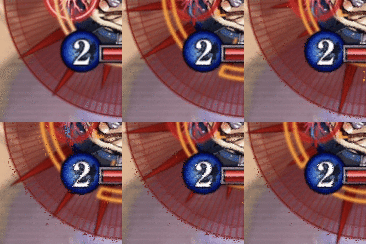
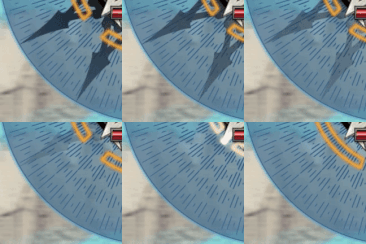
From time to time, you may notice an aura around certain enemies. That's called an Area Skill and they can do a number of things whenever you come in contact with them. When a unit touches one of these Area Skills, a small icon will appear in the bottom portrait and in the unit status. This effects are only applied to the unit itself in his own action.
List of all Area Skills currently in the game:
- Fear: Lowers movement distance each time a unit enters the Area Skill. The effect is removed after the action.

- Pain: Deals damage each time a unit enters the Area Skill.

- Madness: Lowers ATK each time a unit enters the Area Skill. The effect is removed after the action.

- Tactics: Prevents a unit from adding turns to enemies' action count for a few turns.

- Confusion: Prevents a unit from Smashing for a few turns.

- Intimidation: Prevents a unit from using your Command Skill for a few turns.

- Mischief: Prevents a unit from gaining Skill Gauge for a few turns.

| Fear | Pain | Madness | Tactics | Confusion | Intimidation | Mischief |
|---|---|---|---|---|---|---|
 |
 |
 |
 |
 |
 |
|
This areas can be on the wall or have different sizes, even can be bigger than the stage. To counter this faculty the units have Break Skills.
Soul Chips[edit | edit source]
Soul Chips are a resource which you can use to heal your units mid-Quest. The max amount of Soul Chips each of your units have is based on the amount of dupes you have on them up to 10 Soul Chips. Once you used a Soul Chip, you can get it back by either logging in once a day to get 1 for each of your units, or buying them with gold. Do note that during a Soul Poker event, the cost of buying Soul Chips is reduced to 7500 gold.
To use a Soul Chip, just tap portrait at the bottom of the desired unit and a pop up will appear (if the unit has enough Gauge to use his CS, you will need to press and additional button to open the full menu) and there you can see how many Soul Chips you have and a button to use it.
Some Abilities also interact with Soul Chips like Biorno, who multiplies all allies' ATK upon Soul Chip use. There are also Abilities that encourage you not to use Soul Chips like Stroheim, who gives ATK based on the current amount of the unit's Soul Chips.
Soul Chips are also used in Soul Poker quests, using them to bid instead of using stamina.
Continue[edit | edit source]
If all your units die you will lose the quest, however, you can continue the quest and revive all of your units using one diamond. In some quests, using a diamond to continue will prevent you from claiming the quest reward. Also, Expert Challenge quests don't allow you to continue if you fail.
Unit Features[edit | edit source]
Stats[edit | edit source]
All units have base stats that may vary between one and another. These are ATK, HP, movement distance and Smash range.
These stats can play a huge part in your damage, especially ATK. You can gain boosts to these stats by leveling your units or getting dupes for them. Generally it is not recommended to level your units above level 80 after awakening them, as the EXP required to level them to 100 is really high and you don't gain much stats from it either. Beyond leveling and gaining dupes, there are other ways of gaining these base stats like leveling up Ability Slots (more on this later).
All units have the same weight, medal size and speed, but again, these can be modified through Abilities. Weight is a stat that determines how easy it is to push the unit and how easy it is for the unit to push other units. Custom units have the feature of changing these stats (except speed) while the event is up.
Also, each unit will have a cost that starts at 20 and can raise up to 88. When you build a team it can surpass the limit of team cost. At higher Ranks the max team cost is 256.
Attributes[edit | edit source]

Each unit has a single color attribute, including enemy units, the only way to change that are though certain abilities. In rare cases, some units may have a variant of a different attribute, like Jonathan Joestar. Sometimes it's important which unit you are going to use because you can deal more or less damage depending on the attribute of your unit and the enemy target.
 Red (赤): Strong against Green. Weak against Blue.
 Green (緑): Strong against Blue. Weak against Red.
 Blue (青): Strong against Red. Weak against Green.
 White (白): Strong against Black.
 Black (黒): Strong against White.
 Gold (金): Strong against Silver. Can be equiped with Red, Green, and Blue units.
 Silver (銀): Strong against Gold. Can be equiped with White and Black.
Rarity[edit | edit source]
Each unit has a Rarity, and that can be seen in the coin color along with an icon. Copper belongs to N's units, silver for R's, gold for SR's, and rainbow for SSR's, the betters ones. SP units are always SSR's and can be considered the similars to UR's from other gacha games.
N units doesn't have any Ability and can't have any kind of ability equips, while R can have one equip, and SR and SSR can have up to three equips.
| N | R | SR | SSR |
|---|---|---|---|
 |
 |
 |

|
Tags[edit | edit source]
Almost all units have one or more tags. These tags are a way of grouping the units according to one common thing, since not all Leader Skills affects only a color attribute. If one unit has two or more characters, all of them must have that thing in common to get the proper tag. For example, a unit with Giorno Giovanna and DIO will have the Stand User tag but it won't have the Vampire tag.
These is the list of current tags.
Leader Skill[edit | edit source]
Leader Skills and Link Skills (LS) are very important in a team as they can either make or break a run. They might not seem as important at first, but Leader Skills modify the base stats of each unit affected by it (unless it's something that triggers mid-gameplay like Black SHA). These stats are important, as any and all damage buffs or modifiers build off of this number. So take a unit like Shaq for example whose Leader Skill is "Stand users ATK+100%". This means that every Stand User gets their base ATK doubled!
But stats aren't the only thing these can grant. They can give you all sorts of buffs like gaining Skill Gauge per turn, Damage Cut for X turns, more Skill Gauge gained on hit, delay, etc.
Things to keep in mind about both:
- Leader Skills from a Friend unit only work if said person is on your friends list.
- If any Leader units die, their Leader Skills will stay active.
- Any Skill Gauge gain cannot be debuffed if it comes from a Leader Skill or Link Skill.
- Any Abilities that activate when a unit is in Leader will NOT activate if said unit is a guest or on your friends list.
Link Skill[edit | edit source]
Units set in the Link Skill slot will act like an ability equip, it won't gain EXP at the end of a quest.
Command Skill[edit | edit source]
There are as many Command Skills (CS) in the game as there are units, so it would be next to impossible to comment on them all, but generally a good Command Skill boils down to either dealing large amounts of damage that preferably ignores defense or granting safety if you're in a tough spot.
This kind of skill requires Skill Gauge (or just Gauge) to be activated most of the time. To use it, acquire the necessary Gauge for the desired unit's CS and you will see a message over the unit saying "Skill OK" and lightning blinking, then, just tap the unit once, move the unit like usual, then tap again during movement to activate the CS.
Again, using Shaq as an example, his Command Skill stops time which disables ALL other Abilities, be it an enemy or ally. Only specific time stop counters can affect you during his Command Skill.
Enemies can also use their Command Skill, but they don't require Skill Gauge. An enemy will always use it's CS when it is available and you will see when they can if the unit has lightning blinking like your own units.
To increase the level of a unit's CS you must feed it with Zeppeli Frogs or using other units like the R units that you don't want, this can be done in the Enhance Units menu.

Abilities[edit | edit source]
See also: Joker
Abilities (ABI) are simply passives that each unit has. Each one can do a wide range of things and it is important to understand them and find synergy with other Abilities. For example if you have a unit whose Command Skill deals a lot of hits, it's a good idea to equip an Ability that grants an ATK boost per hit and/or more movement distance.
Abilities are unlocked after a unit reaches Lv. 15 and then is awakened with materials. Once this is done, the Ability can be equiped to another unit with same color attribute and being Lv. 30 awakened or over. At Lv. 50 you can equip another Ability and even more if you reach Lv. 80.
To equip Abilities to units, go to the Team Build menu and press the button of the hexagon grid (highlighted in the image). A different menu will appear. There you can see the Ability of the unit itself that can't be unequiped, his current level, the Ability cost, the Ability points used and the total. Only Abilities of the same color attribute that are already awakened can be equipped. Keep in mind that better abilities will have a higher cost, and you can't exceed the ability capacity of the unit.
Each Ability Slot has a max level of 10 and needs Metals to upgrade and these materials can be farmed from Stroheim Quests. Leveling up a slot makes said slot grants a percentage of the equipped unit's base stats to the unit you equipped them onto, and the max level gives 50% stats for SSRs and 30% for SRs. This also heavily implies that you should level your equips to at least around level 50 or so as this base stat gain can even double your base unit's stats.
| Metal parts | ||||||
|---|---|---|---|---|---|---|

|

|

|

|

|

|

|
The level of the Abilities can be increased obtaining duplicates of the same unit or using Frogs with the Stone Mask when feeding them, up to Lv. 20, . The first 6 levels guarantee an ability level up, after that, it's just a matter of luck.
Enemies will also have one or more Abilities that can be seen just tapping one during your turn.
The most commons are these:
- Defence according to number of items or Gauge.
- Action count reset.
- Spawn traps after each action.
- Counter and return the contact damage.
- Smash counter.
- Contact and/or Smash inmuinity.
- Command Skill seal.
- Explode after dying.
- Increase enemy defence/reduce allies damage.
Variable Slot[edit | edit source]
Each unit may only have one Variable slot, and to buy the slot for an SSR costs 10 Shining Coins, and 30 normal coins. To buy the slot on an SR unit will cost you: 30 normal coins, and no shining coins. These can be obtained from the Time Attack store, via the following purchase options:
| Gold Coins | Silver Coins | ||
|---|---|---|---|
 |
5x Shining Gold coins: 1800TP Each (5 available.) |  |
5x Shining Silver coins: 1800TP Each (5 available.) |
 |
1x Shining Gold coins: 400TP Each (5 available.) |  |
1x Shining Silver coins: 400TP Each (5 available.) |
 |
5x Gold Coins: 800TP Each (10 available.) |  |
5x Silver Coins: 800TP Each (10 available.) |
 |
1x Gold Coins: 200TP Each (10 available.) |  |
1x Silver Coins: 200TP Each (10 available.) |
There are also times at which the store will sell larger bundles for cheaper prices during certain celebrations, such as anniversaries. In these store you can also find other items and Frogs.
Listed below are the equips that are currently available in the Variable slot, and will be continually updated:
ExpandCollapse
Green
(SSR) Jonathan Joestar (Turquoise Blue Overdrive)
(SSR) Jonathan Joestar (Tower Battle)
(SSR) Joseph Joestar (Death of Comrade)
(SSR) Wamuu (Platinum Ring)
(SSR) Kars and Wamuu
(SSR) Keicho Nijimura
(SSR) Joseph Joestar (TV spirit photography)
(SSR) Noriaki Kakyoin (F-MEGA)
(SSR) Noriaki Kakyoin (Glasses)
(SSR) Jotaro Kujo and Noriaki Kakyoin (Meteor and Barrier)
(SSR) Rohan Kishibe (Heaven's Door)
(SSR) Keicho Nijimura
(SSR) Rohan Kishibe (Voiceless!)
(SSR) Okuyasu Nijimura and Keicho Nijimura (Expert Challenge)
(SSR) Yoshikage Kira (Kosaku Kawajiri) (Green)
(SSR) Kosaku Kawajiri (Login Bonus)
(SR) Joseph Joestar (Clacker Boomerang)
(SR) Joseph Joestar (Hamon pasta)
(SR) Rudol von Stroheim (Be prepared to be blown away!)
(SR) Wamuu (You’re qualified to die to Wamuu!)
(SR) Kars (Cruel and Vivid Surprise)
(SR) Wamuu (Link Skill)
(SR) Gray Fly (Tower Needle)
(SR) Noriaki Kakyoin (Flashing green lights)
(SR) Forever (Gufugugu~ This whole ship is my Stand!)
(SR) Chaka (Defense)
(SR) Mariah (Bastet's Magnetic Force)
(SR) Pet Shop (Wall)
(SR) Forever (Caged)
(SR) Rat
(SR) Rohan Kishibe (What it tastes like)
(SR) Rohan Kishibe (You too will be my document!)
(SR) Rohan Kishibe (Safety device)
(SR) Rohan Kishibe (Absolute instruction)
(R) Speedwagon
(R) Wamuu
(R) Gray Fly
(R) Forever
(R) Stray Cat
Blue
(SSR) Jonathan Joestar (Platinum Ring)
(SSR) Jonathan and Speedwagon
(SSR) Caesar A. Zeppeli (Bubble Laser!)
(SSR) Caesar A. Zeppeli (Bubble Cutter)
(SSR) Jean Pierre Polnareff
(SSR) Jean Pierre Polnareff (Silver needle skewer)
(SSR) Hol Horse
(SSR) Jotaro and Polnareff
(SSR) Jean Pierre Polnareff (Dying)
(SSR) Telence T. D'Arby (F-MEGA)
(SSR) Jean Pierre Polnareff and Noriaki Kakyoin
(SSR) N'Doul (Login Bonus)
(SSR) Jean Pierre Polnareff (Go to Hell)
(SSR) Jotaro Kujo and Koichi Hirose
(SSR) Okuyasu Nijimura (Gotcha now, bastard!)
(SSR) Yoshikage Kira (Sheer Heart Attack)
(SSR) Yoshikage Kira (Kosaku Kawajiri) and Stray Cat
(SSR) Josuke Higashikata and Mikitaka Hazekura
(SR) Jonathan Joestar (Sendo Hamon Overdrive!)
(SR) Jonathan Joestar (Link Skill)
(SR) Caesar A. Zeppeli (Hamon macaroni)
(SR) Lisa Lisa (Snake Muffler)
(SR) Caesar A. Zeppeli (Link Skill)
(SR) Jean Pierre Polnareff (Anime Ver.)
(SR) Jean Pierre Polnareff and Noriaki Kakyoin (Anime Ver.)
(SR) Death Thirteen (Gauge)
(SR) Steely Dan (Attack the same place over and over!)
(SR) Pet Shop (Frozen ground)
(SR) Steely Dan (The Weakest is the Most Terrifying)
(SR) Chaka (Transparent Sword)
(SR) Enya Geil (Screwed personality)
(SR) Hol Horse (Come on~)
(SR) Yuya Fungami (60 Km/h)
(SR) Josuke Higashikata (Fix it to its original form)
(SR) Kosaku Kawajiri (Stardust Ring)
(SR) Shigekiyo Yangu (Trade Power)
(R) Donovan
(R) Jean Pierre Polnareff
(R) Enya Geil
(R) Steely Dan
(R) Impostor Captain Tennille
(R) N'Doul
(R) Anjuro Katagiri
(R) Yuya Fungami
Red
(SSR) Tarkus
(SSR) Jonathan Joestar and Bruford
(SSR) Jonathan Joestar (Expert Challenge)
(SSR) Wamuu and Esidisi
(SSR) Jotaro Kujo (New Ver. 2)
(SSR) Jotaro Kujo (Limited)
(SSR) Jotaro Kujo (Tower Battle)
(SSR) Jotaro Kujo and DIO (Eyes of Heaven)
(SSR) J. Geil and Hol Horse
(SSR) DIO (Muda)
(SSR) Muhammad Avdol (SP Campaign)
(SSR) Anubis (Login Bonus)
(SSR) Koichi Hirose【ACT2】
(SSR) Koichi Hirose【ACT2】 (Rock to Save You)
(SSR) Koichi Hirose (Platinum Ring)
(SSR) Koichi Hirose and Yukako Yamagishi
(SSR) Akira Otoishi (Shut up!)
(SSR) Akira Otoishi (Expert Challenge)
(SSR) Kosaku Kawajiri
(SSR) Josuke Higashikata and Jotaro Kujo (Crazy D and Star Platinum The World)
(SR) Jonathan Joestar (Kill with the sword of Luck and Pluck!)
(SR) Joseph Joestar (Young)
(SR) Jotaro Kujo (Anime Ver.)
(SR) Muhammad Avdol (Magician's Red)
(SR) Muhammad Avdol (Link Skill)
(SR) Muhammad Avdol (Soul Inheritance)
(SR) ZZ (Fierce Wheels)
(SR) ZZ (Assault)
(SR) J. Geil (Wall)
(SR) Midler
(SR) Khan (Stronger and Faster with every swing!)
(SR) Anubis (Just cut through it!)
(SR) Koichi Hirose (I won't forgive you!)
(SR) Okuyasu Nijimura (Continuous attack)
(SR) Yukako Yamagishi (Chair that flow current)
(SR) Aya Tsuji (Faces)
(SR) Stray Cat (Exploding Cactus)
(SR) Kosaku Kawajiri (Anime Ver.)
(SR) Aya Tsuji (Link Skill)
(R) Dire
(R) Tarkus
(R) Wired Beck
(R) Jotaro Kujo
(R) Muhammad Avdol
(R) ZZ
(R) J. Geil
(R) Masazo Kinoto
(R) Khan
White
(SR) Joseph and Avdol
(SSR) Jonathan Joestar (Custom Campaign)
(SSR) Jonathan Joestar (SP)
(SSR) Jonathan Joestar and William A. Zeppeli
(SSR) Jonathan Joestar (Sunlight Yellow Overdrive)
(SSR) William Anthonio Zeppeli (New Ver.)
(SSR) William Anthonio Zeppeli (Ultimate Deep Pass Overdrive)
(SSR) Joseph Joestar (Plant Grenade)
(SSR) Lisa Lisa (Platinum Ring)
(SSR) Lisa Lisa (Elizabeth Joestar)
(SSR) Iggy
(SSR) Iggy (I will not forgive you anymore!)
(SSR) Jotaro and Joseph
(SSR) Josuke Higashikata (Golden Spirit)
(SSR) Josuke Higashikata (Crazy D)
(SSR) Josuke Higashikata (Login Bonus)
(SSR) Shigechi Yangu
(SSR) Shigekiyo Yangu (Caterpillar Tank)
(SSR) Koichi Hirose and Yukako Yamagishi (Login Bonus)
(SR) Robert E. O. Speedwagon (Link Skill)
(SR) Robert E. O. Speedwagon (Devotion)
(SR) William A. Zeppeli (Link Skill)
(SR) Zeppeli and Speedwagon (Dedication)
(SR) Jonathan Joestar (Young)
(SR) Straizo (Stardust Ring)
(SR) Caesar A. Zeppeli (Cat Stance)
(SR) Lisa Lisa (Masked)
(SR) Lisa Lisa (Hamon punishment)
(SR) Kars (Ring of light)
(SR) Jotaro Kujo (Star Finger!)
(SR) Iggy (Wall)
(SR) Iggy (Anime Ver.)
(SR) Iggy (Tank)
(SR) Jean Pierre Polnareff (Kid)
(SR) Rubber Soul (Yellow Temperance)
(SR) Rubber Soul (Finish you off)
(SR) Rubber Soul (Rero Rero)
(SR) Joseph Joestar (Hermit Purple)
(SR) Josuke Higashikata (I have a surgeon get it out)
(SR) Josuke Higashikata (Anime Ver.)
(SR) Jotaro Kujo (Go further away!)
(SR) Hayato Kawajiri (SP Campaign)
(SR) Tonio Trussardi (Link Skill)
(SR) Aya Tsuji
(R) Josuke Higashikata
(R) Jotaro Kujo (Part 4)
(R) Shigekiyo Yangu (Bucket relay)
(R) Rubber Soul
Black
(SSR) Bruford and Tarkus
(SSR) Bruford
(SSR) Dio Brando (Platinum Ring)
(SSR) Dio Brando and Wang Chan
(SSR) Esidisi【Black】
(SSR) Kars (Expert Challenge)
(SSR) Straizo
(SSR) DIO (Shadow)
(SSR) DIO and Pet Shop
(SSR) Vanilla Ice (I'll end this)
(SSR) DIO (Road Roller)
(SSR) DIO (Checkmate)
(SSR) DIO (The World)
(SSR) Yoshikage Kira
(SSR) Kosaku Kawajiri (Bites the Dust)
(SSR) Yoshikage Kira (Bomb tank)
(SSR) Kosaku Kawajiri and Yoshihiro Kira
(SSR) Yukako Yamagishi (Platinum Ring)
(SR) Dio Brando (Space Ripper Stingy Eyes!)
(SR) Dio Brando (Young)
(SR) Bruford (Hair? What is this!)
(SR) Bruford (Dance macabre hair)
(SR) Jack the Ripper (Muscle contracted scalpels!)
(SR) Kars (Light Mode)
(SR) Santana (Rib Blades)
(SR) Joseph Joestar (Tequila Joseph)
(SR) Straizo (Immortal Body)
(SR) Noriaki Kakyoin (Hierophant's greetings)
(SR) Vanilla Ice (Space movement)
(SR) Vanilla Ice (Anger is getting frustrating)
(SR) Jean Pierre Polnareff (Link Skill)
(SR) Nukesaku (Satisfaction)
(SR) Enya Geil (Link Skill)
(SR) Devo the Cursed (Should I leave it in?)
(SR) Keicho Nijimura (Simultaneous Shooting)
(SR) Tamami Kobayashi (Conscience)
(SR) Tamami Kobayashi (Fairness)
(SR) Akira Otoishi (Give me a thunderous applause)
(SR) Terunosuke Miyamoto (You were easy to make into paper)
(SR) Yukako Yamagishi (Flames of Jealousy)
(SR) Yukako Yamagishi (You're mine!)
(R) Adams
(R) Santana
(R) Devo the Cursed (Devil's blunt)
(R) Terunosuke Miyamoto
(R) Toshikazu Hazamada
Assist Ability Slot[edit | edit source]
Purchasing an Assist Slot requires Keys, which is a new type of currency that was previously only obtainable through banner incentives, but with the addition of Requiem Road it is now possible to attain keys as clear rewards from each floor. Sometimes, Keys will be available for purchase in the SP Campaign Shop or even as a reward after doing certain number of steps when pulling on banners.
| Red Key | White Key | Black Key | Green Key | Blue Key | Gold Key | Silver Key |
|---|---|---|---|---|---|---|

|

|

|

|

|

|

|
Each unit may only have one Assist Slot, and to buy a slot for an SSR unit it will cost you 500 Keys (100 for an SR unit) that correspond with the unit's color (ex: a Blue unit would need 500 Blue Keys etc.).
Break Skill[edit | edit source]
Others Mechanics[edit | edit source]
Rank[edit | edit source]
Your Rank means more than just roughly how much you've played the game. Ranking up can give you a lot of bonuses like increasing your max stamina, increasing max team cost, increasing friend list size, and increasing the max amount of teams you can have at once.
Stamina[edit | edit source]
Stamina is your main resource for playing the game, so the more you have, the better. Stamina regenerates over time, you gain 1 stamina once per every 5 minutes and ranking up refills this resource and can overfill. Your max stamina also determines what quests you can do. If your max stamina is lower than the quest's stamina requirement, you can't start the quest. Though if this is the case, the quest is probably too hard for you anyway.
Another way of refilling is using a Diamond from the Shop menu.
Diamonds[edit | edit source]
Diamonds are the premium currency of this game. They can of course be bought with money, or earned from clearing quests. Diamonds can be spent in exchange for many things, like refilling stamina, reviving in a quest when you failed it, expand BOX space, and of course summon on the gacha.
Friends[edit | edit source]
See also: Friends
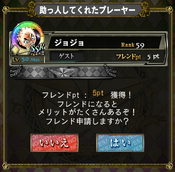
Before entering a Quest, you will need to pick a guest unit from a list of player with you similar Rank. You can use this unit as your own, with its Command Skill and Abilities equipped. If you complete the quest a pop up will appear asking if you want to add that player as a friend.
If you select a friend instead of a guest you will also have another Leader Skill, so, if the friend unit and your Leader are the same the Leader Skill effect will be doubled. Also, using a friend will give you 5pt for using in the Friend Point Gacha and also it will give more points for the events.
The unit available will be always the Leader of your friend's first team, take note of this to share your units to help your friends to beat Ultimate Technical Battles that have color attribute restrictions. You can use a friend unit again after four hours have passed.
Friend rank system[edit | edit source]
When repeatedly using your friend units you'll be able to level up the heart system with them. Doing this opens up a myriad of different bonuses for both players involved in the heart system ranking up.
When you use your friends, you gain a small increase on the friend rank level up bar. It starts off at zero and gradually increases with each use that both you and that friend has of the other players units. While doing this, the heart next to the bar will fill up. The gold half of the heart represents how you use your friends' unit, and the red half represents them using your unit.
You'll also notice on the level up screen of the heart system that you'll sometimes have a silver heart, or very rarely a gold heart appear next to the rank that's being displayed with one of your friends. The silver heart represents achieving a half completion of the heart in the friend rank system, and the gold heart represents a fully completed heart with your friend. These little bonuses still continue to show on your friends list even after the friend rank level resets every month, and can be seen as decoration to show who your most used friend units are on your account, and in turn who's also frequently using your friend unit.
Keep in mind however that if you wish to achieve a gold rank with a friend, then both players need to be frequently using the other persons units as progress is reset once per month, and even with frequent use it can still take up to weeks to finally achieve the gold heart with someone, although this all depends on how often you use them and how often they use your unit, remember that the maximum efficiency would have to be every four hours, which is when the game resets your friends to become active again after their initial use.
Comrades[edit | edit source]
If a player is on your friend list, it's possible that you can transform this friend into a comrade. When starting an account you'll have a set amount of comrade slots that you can use to transform a friend unit into a comrade unit, this can be seen by accessing your friends list and looking at the bar at the top of the list. There's three different numbers, which correspond to the amount of friends you have added, the amount of comrades you have, and the amount of comrade slots that you have free.
If you have a comrade slot, you can scroll to the person on your friends list and push the circular button above the remove friend button. Doing this will transform the circular button into a new button that appears red and has the image of two people shaking hands, to signify that you're now comrades with this user.
The benefits of becoming comrades with another user is that it now allows you to make use of two friend units from the user. With a normal friend unit you're able to use their unit that's in their first slot in their first team. Being comrades however allows for you to use this unit, as well as the unit they have in the first slot of their second team, which can be incredibly helpful. As well as this, you'll also see an SP increase when an SP event is active when you're using a comrade unit.
Even though you only have limited comrade slots when starting your account, please keep in mind that you'll also gain more comrade slots during certain time periods in the game. During events such as anniversaries, the game will sometimes allow players to turn three more friend units into comrade units. It's also possible for other players to turn you into a comrade, and it'll count for both them, and yourself.
Rewards and Drops[edit | edit source]
See also: Items
See also: Frogs
Each Quest type (Expert Challenge, Tower Battle, Ultimate Missions, Encounters, etc...) has a normal and/or unique way of handling rewards and drops. Quests like Encounters and Campaign Quests will always at least one copy of the featured unit on 45/40/30 stamina and 15/10 stamina difficulties respectively. Hard Ultimate Missions (50 and 60 stamina difficulties) will reward you one copy of the featured unit as opposed to having it be a guaranteed drop. Expert Challenge doesn't have any reward but it always drop the unit that opens the chest. Lastly, some quests like Tower Battle and some Techs need a requirement to be fulfilled before you can be rewarded the featured unit/prize, what the requirements differ each time but always requires to not revive using a Diamond. Note that Tower Battle, Expert Challenge, and Ultimate Missions still have a drop rate for the featured unit, albeit being a very low chance.
Typically the harder the quest is the more likely the higher drop rate will be, though this isn't always guaranteed. On top of that the "rarer" or more "valuable" the unit is the less likely it'll drop. In harder quests, all drops are not listened in the quest info tab, most of them are R and N units.
There are also quests that drop useful items and frogs, these quests typically have a high drop rate and follow the rule of higher difficulty equals better drops. For item quests, harder missions result in higher-tier materials whereas frog missions drop higher exp granting frogs.
The game it also rewards the player with diamonds for beating a quest for the first time. The quantity vary between what kind of quest is cleared.
ExpandCollapse
- Encounter Quest:
- 45 Stamina - 1 Diamond
- 40 Stamina - 5 Diamonds
- 30 and 20 Stamina - 5 Diamonds
- Expert Challenge - 8 Diamonds
- Tower Battle
- 1 Diamond per floor played
- Ultimate Mission
- 60 Stamina - 8 Diamonds
- 50 Stamina - 8 Diamonds
- 40 Stamina - 4 Diamonds
- Technical Battle - 1 Diamond
- Limit Battle
- 15 Stamina - 3 Diamonds
- 10 Stamina - 2 Diamonds
- 5 Stamina - 1 Diamond
- Campaign Quest
- 15 Stamina - 2 Diamonds
- 10 Stamina - 1 Diamonds
- Expert CC - 15 Diamonds (Chest reward)
References[edit | edit source]
See Also[edit | edit source]
Notes[edit | edit source]
- ↑ Zombies are included as Vampires.
